Van build journal · October 7, 2026
The wiring comes before the next build step.
I’ve been opening up the dash on my 1996 Ford E-150 Elk and following damaged wiring farther into the harness. This update is about what I found, how far I got, and why the next step is an inspection rather than calling the repair finished.
Current repair status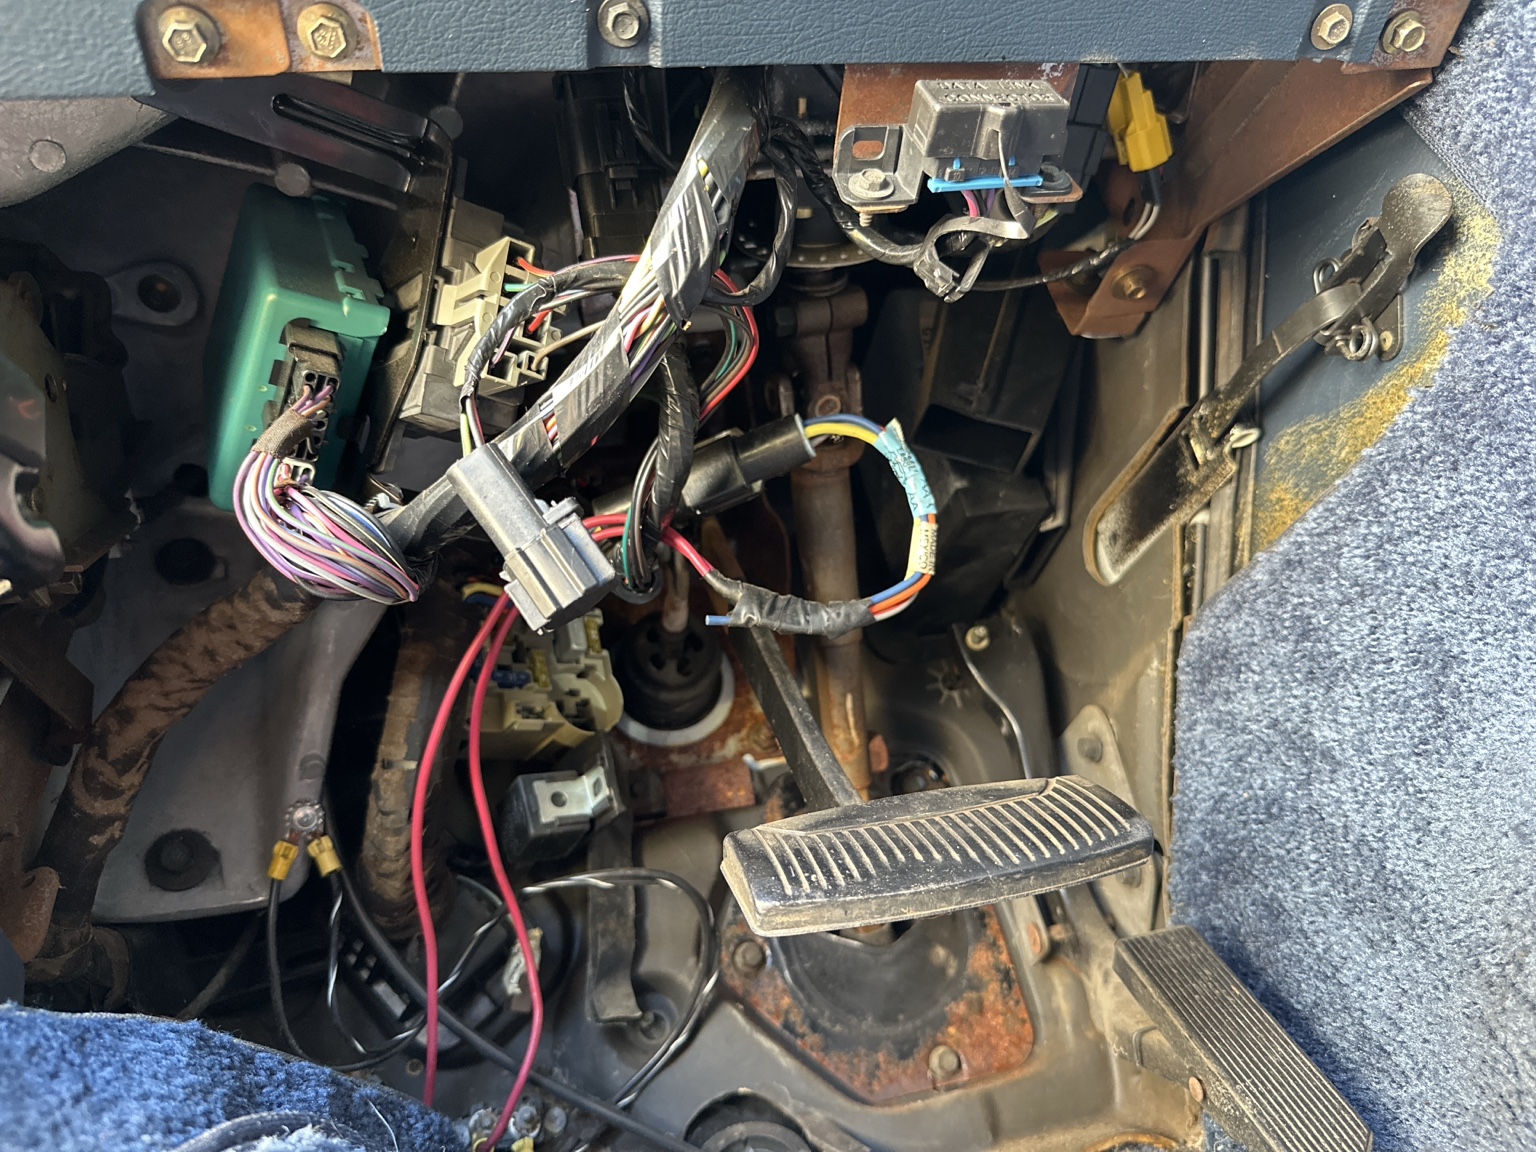
Status: inspection planned
Not repaired yet. No quote yet.
I called Phillips Installation. The next step is to take the van in after payday so they can inspect it, confirm whether they can take on the work, and give me a quote. That is a plan, not a completed appointment or an accepted repair estimate.
No electrical-repair spending is being added to the budget yet. The existing recorded total stays $2,018.32: $1,638.32 in build purchases and $380.00 in title, registration and paperwork.
The dashboard harness
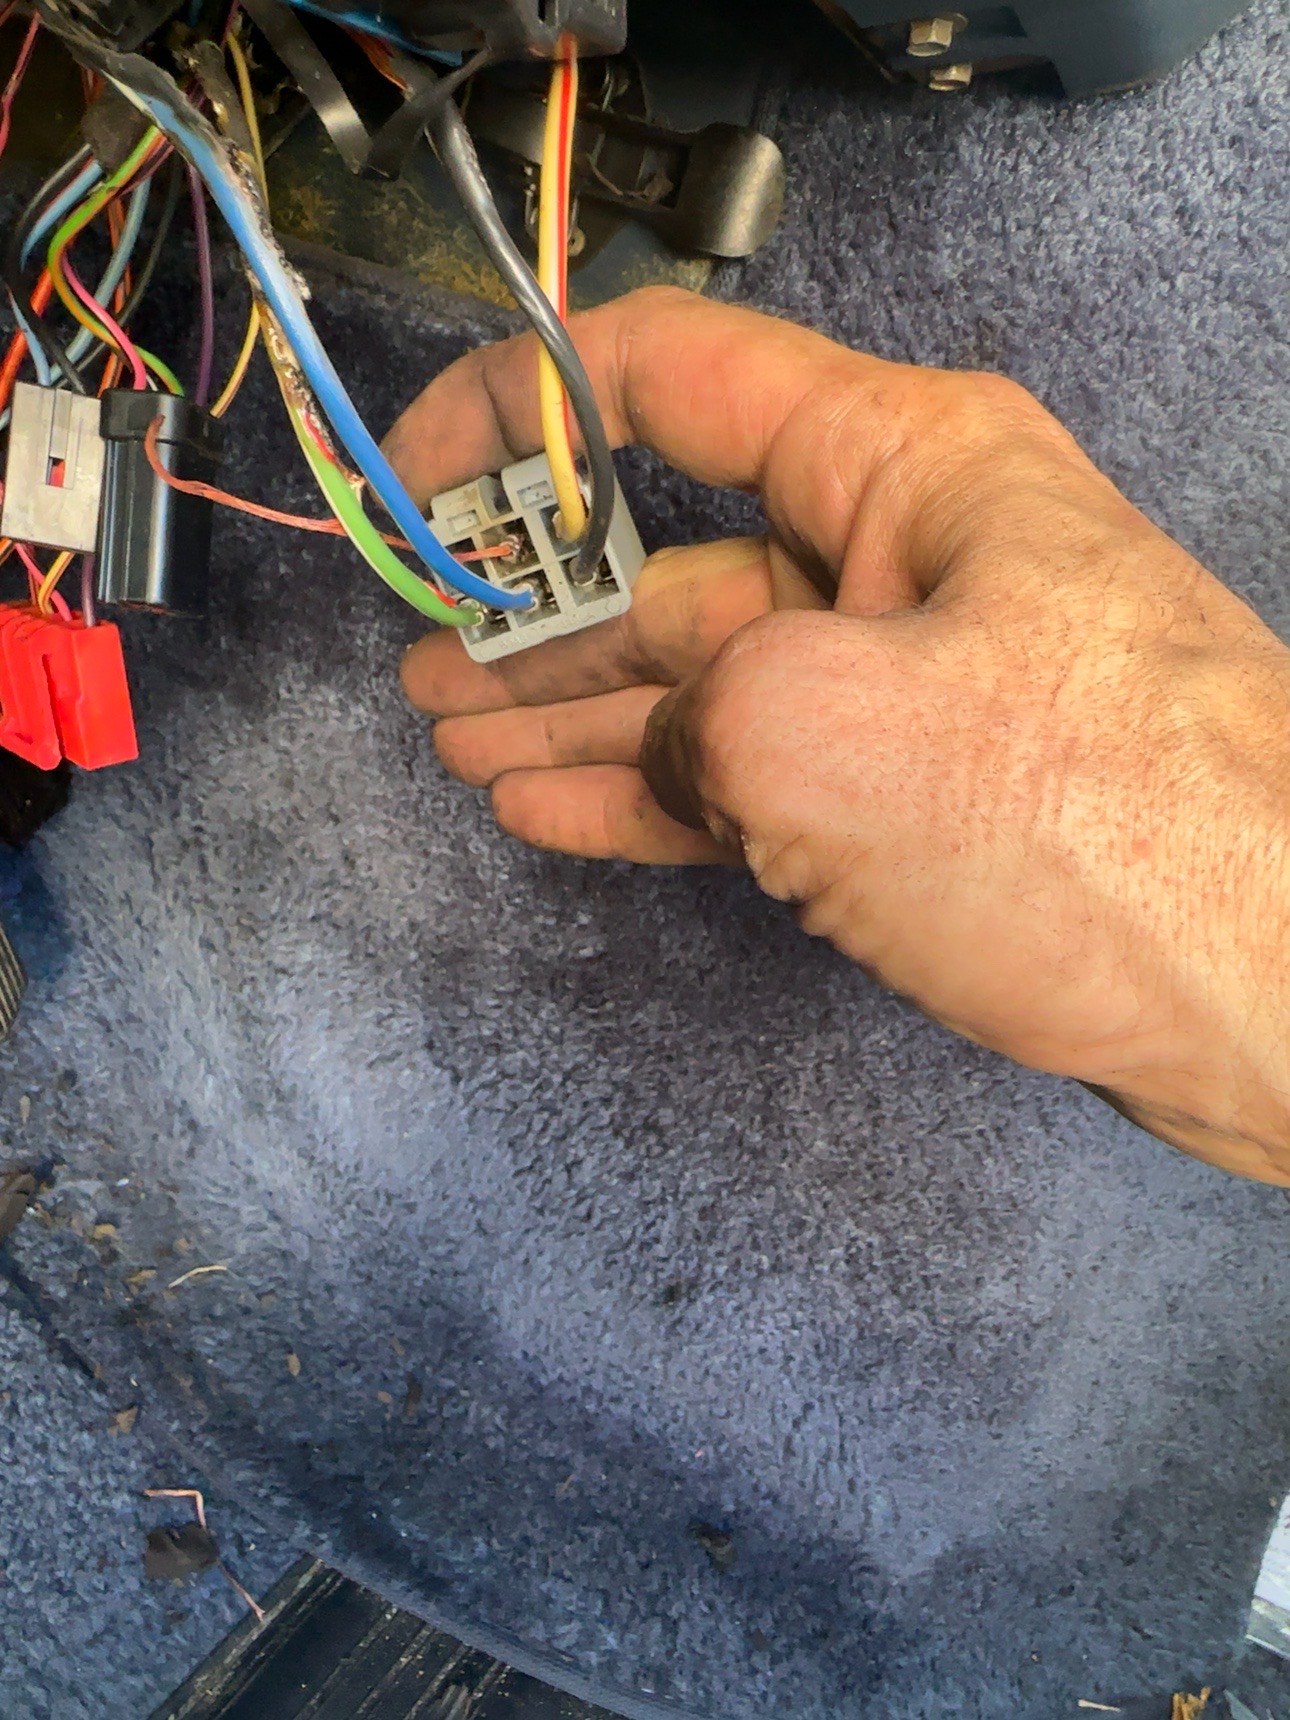
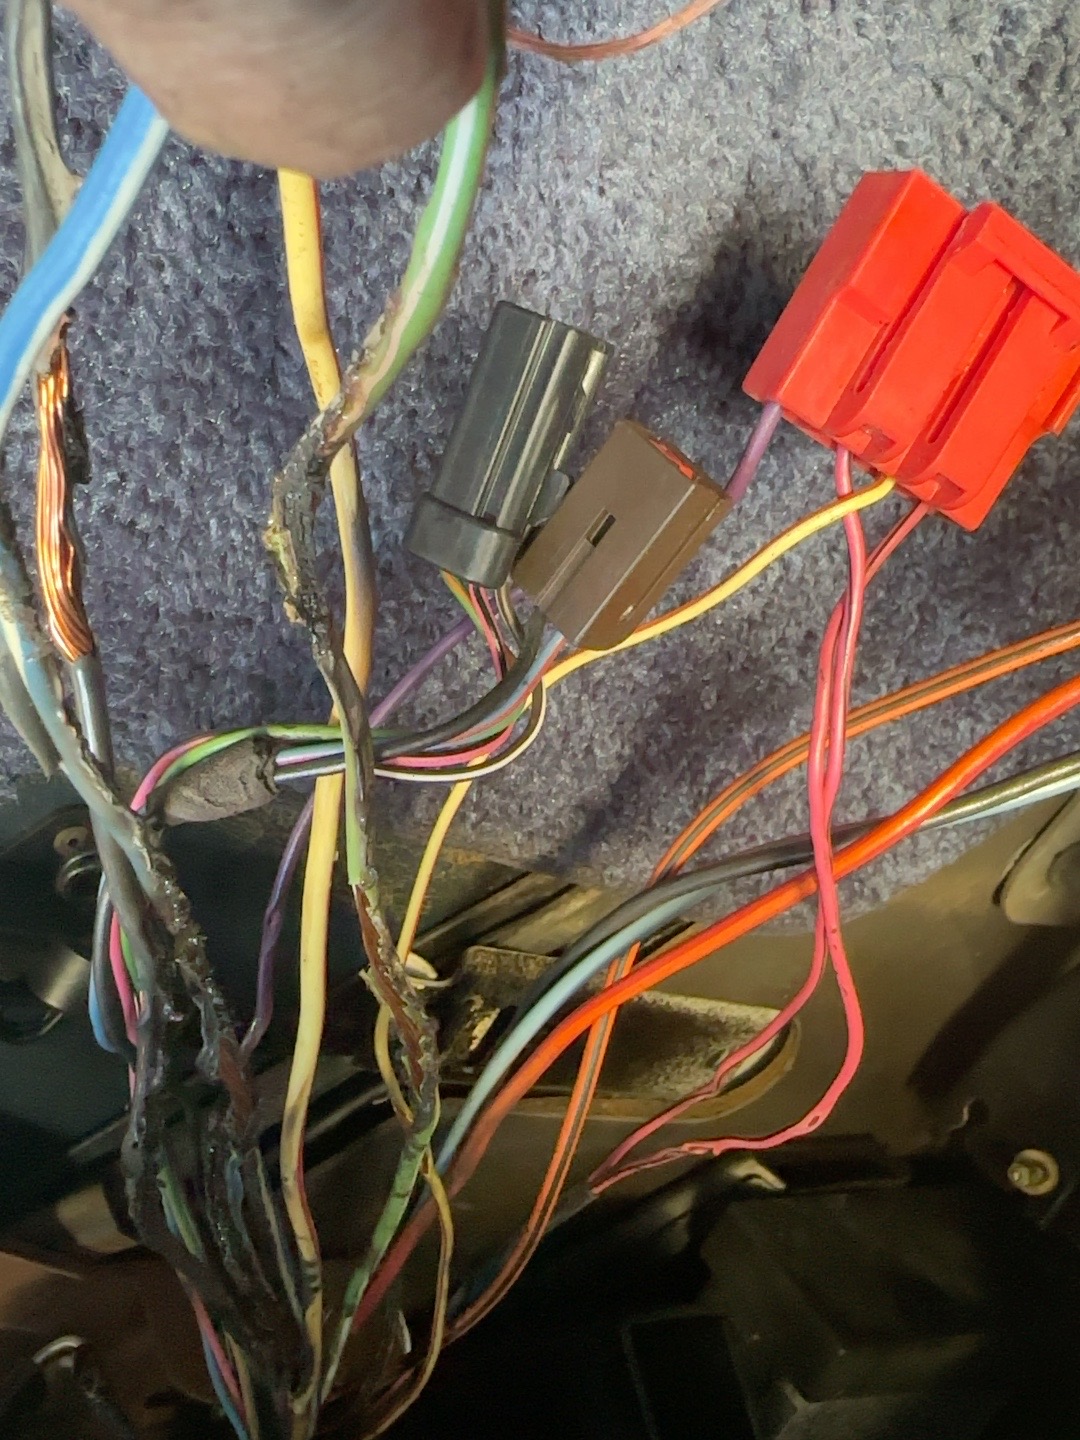
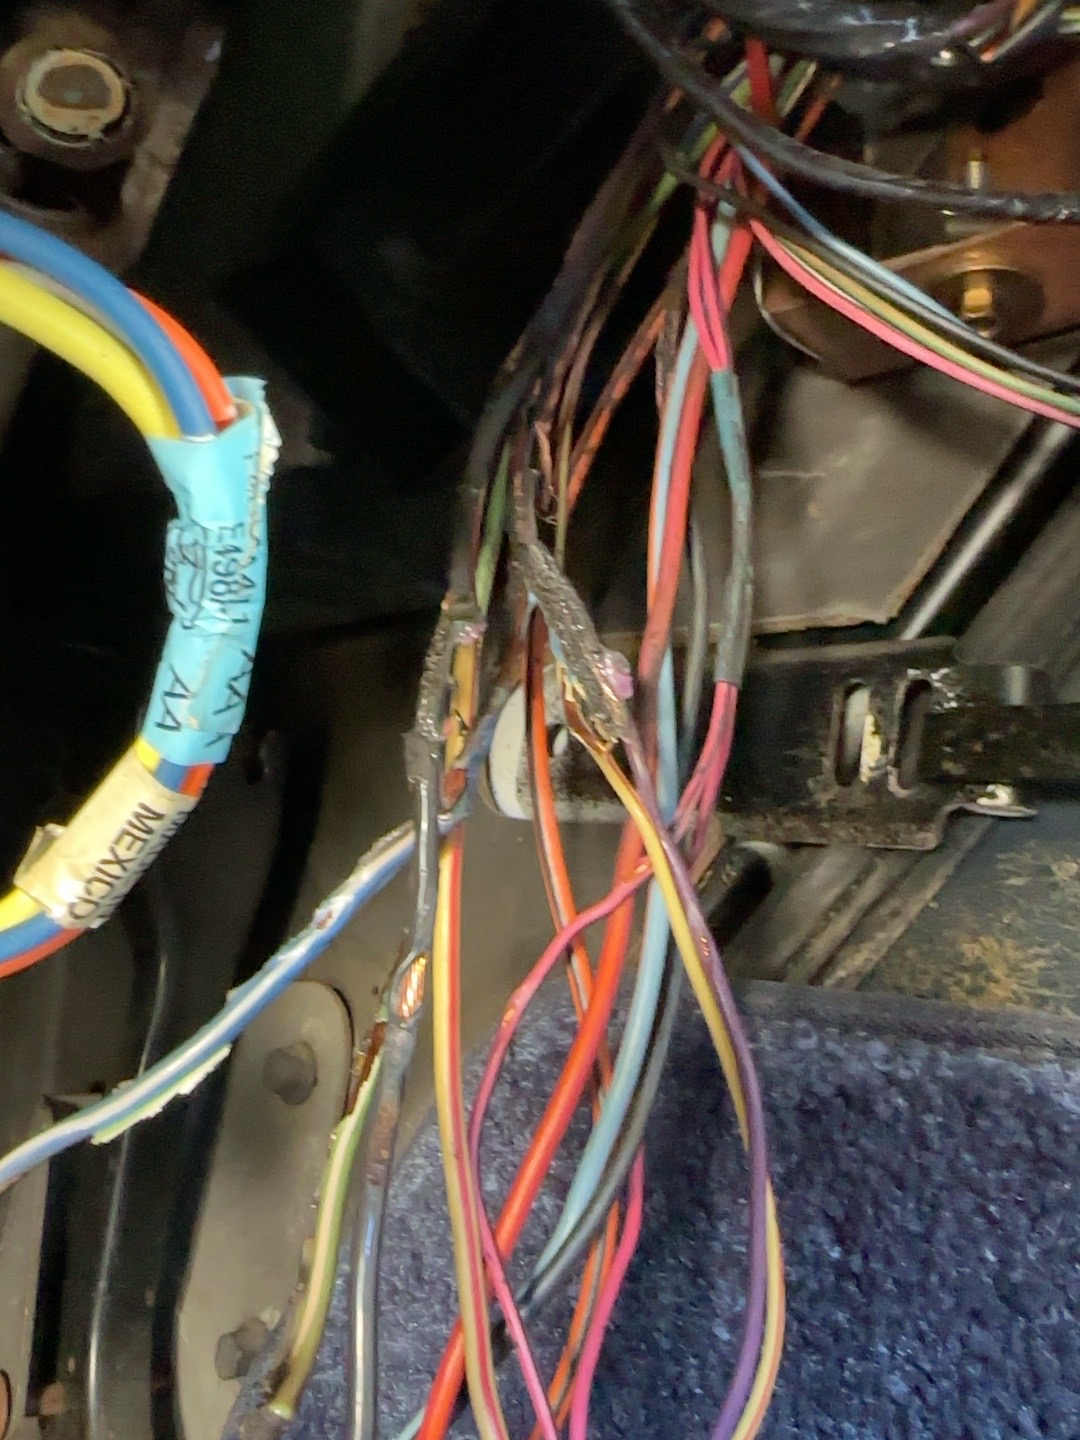
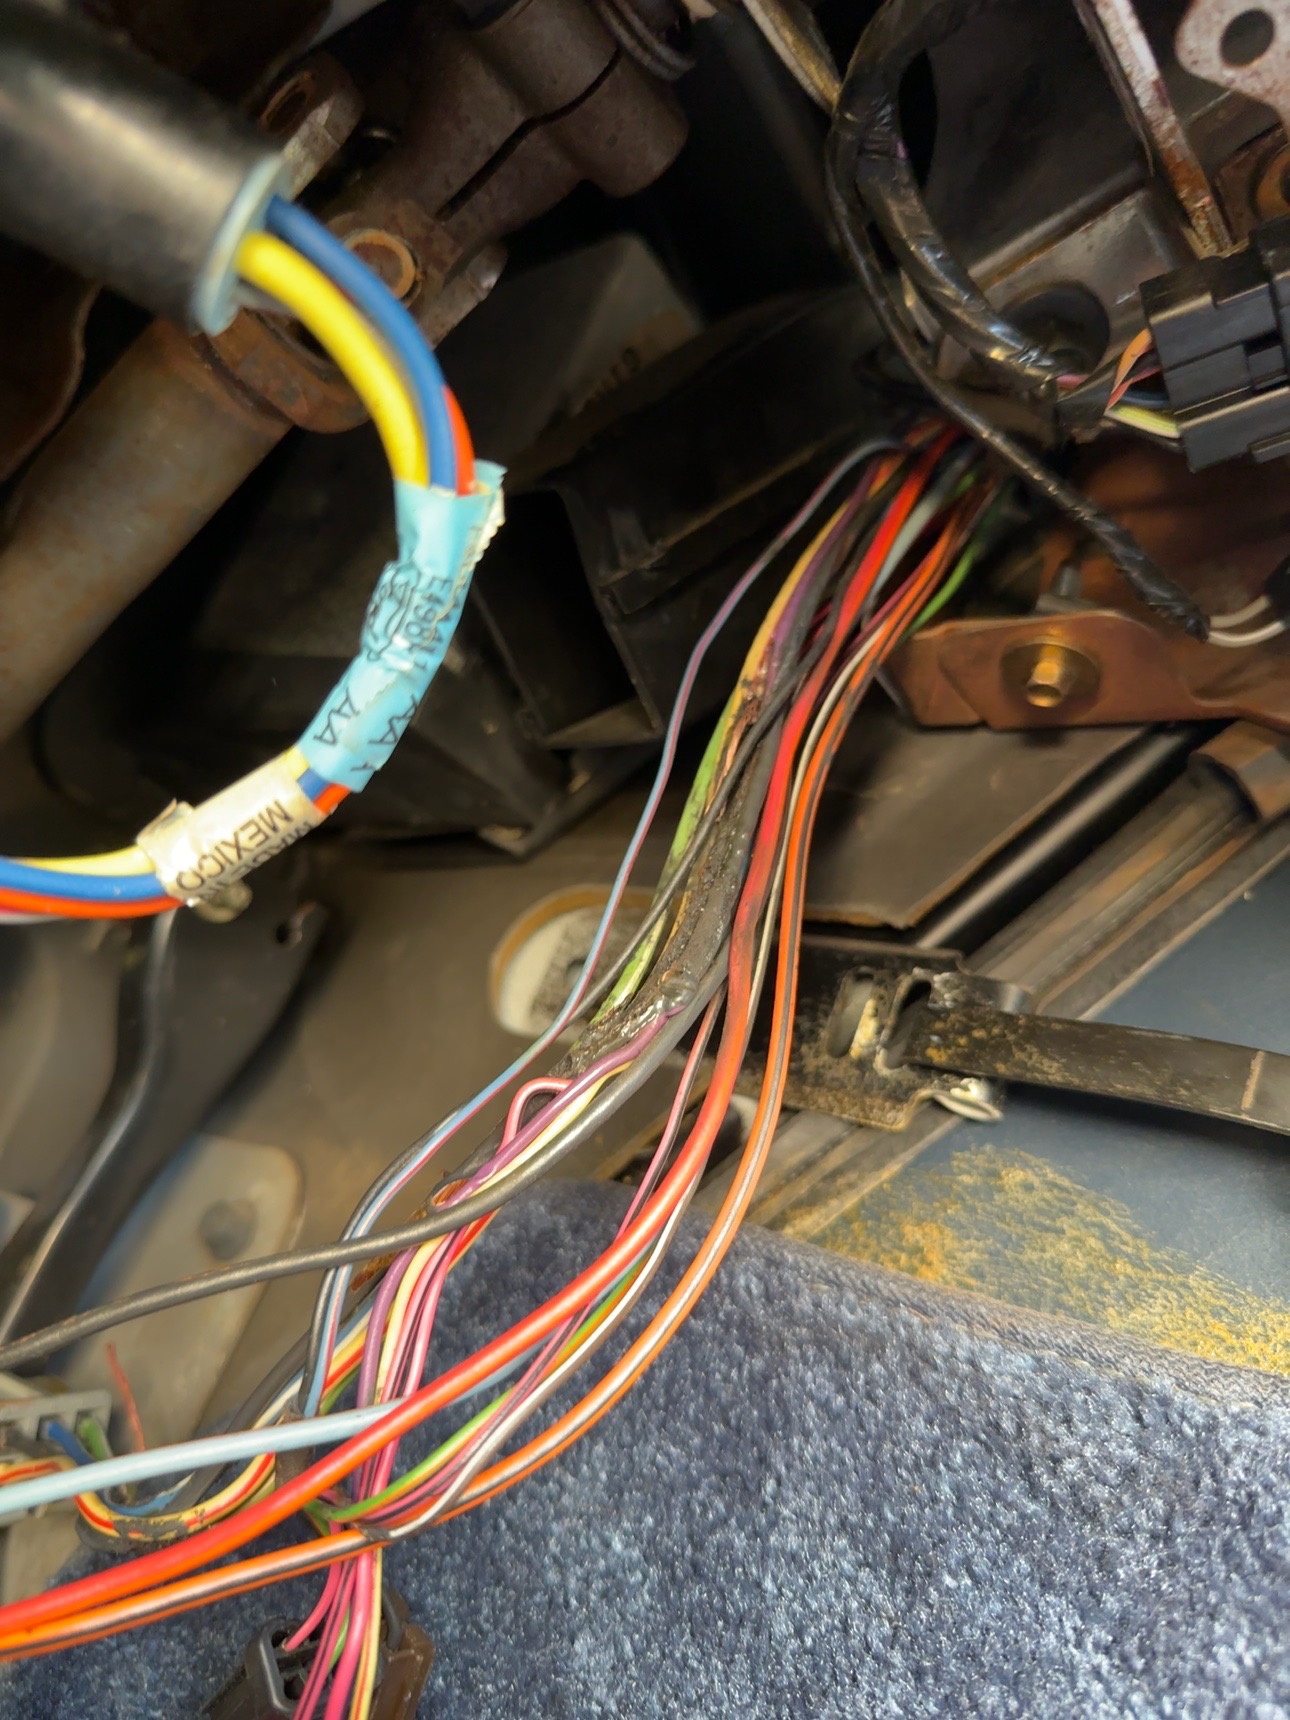
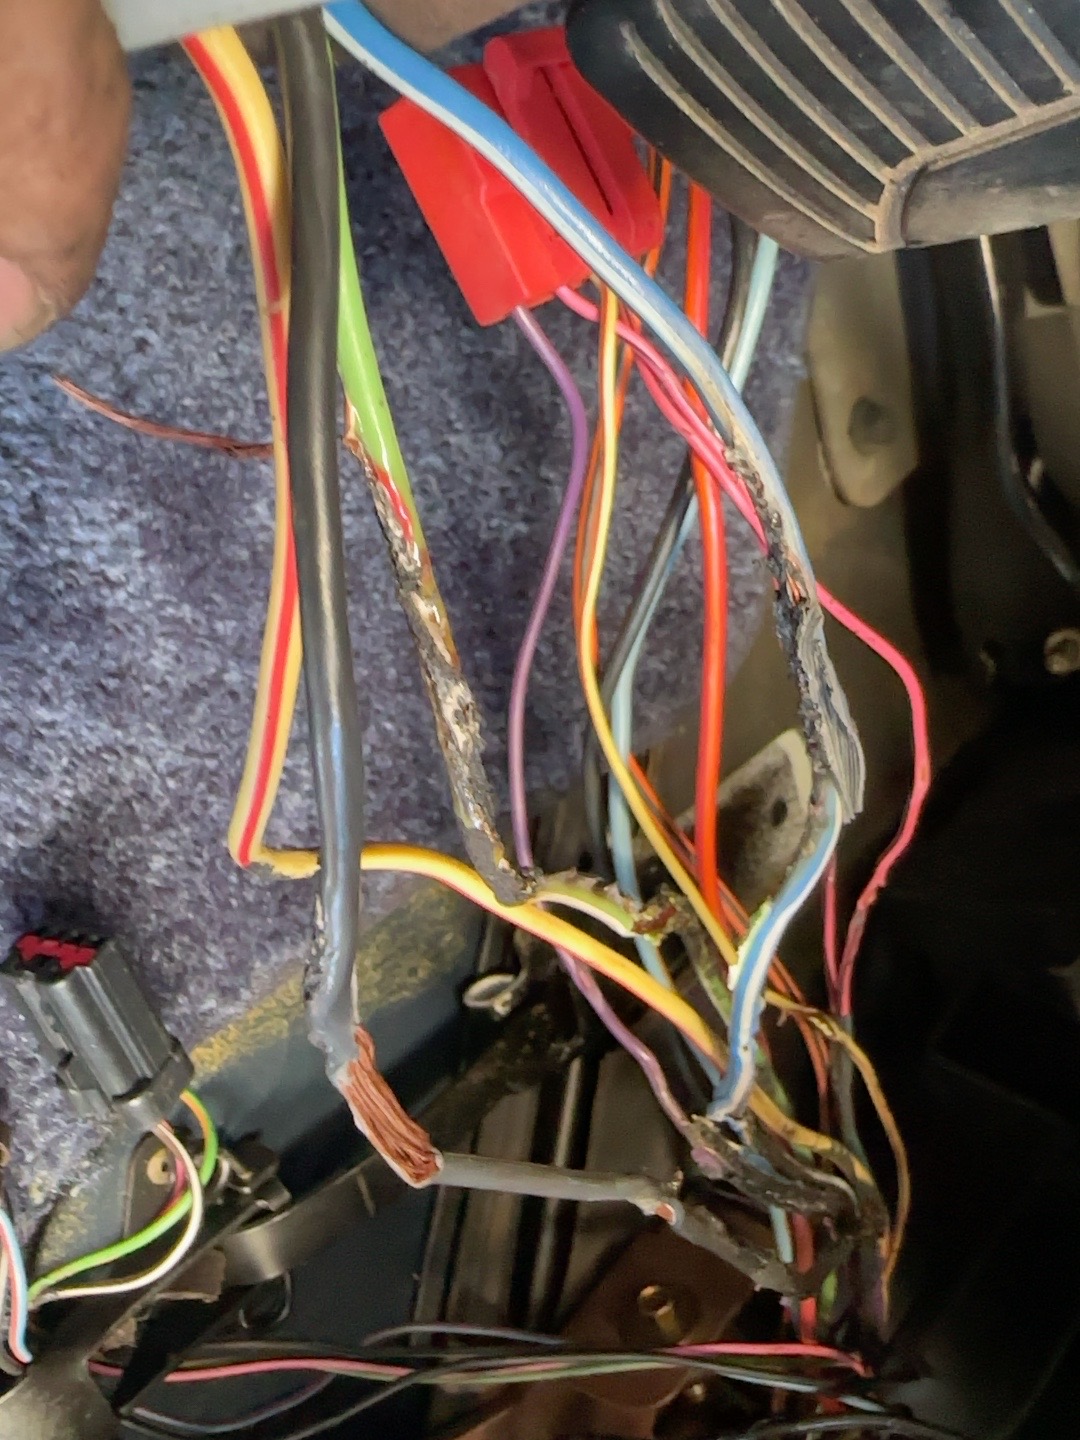
I found burned and melted wiring under the dash. Pulling more of the harness down exposed more damage, and I could still see affected wiring farther behind the metal support. I couldn’t establish where all of the damage ended.
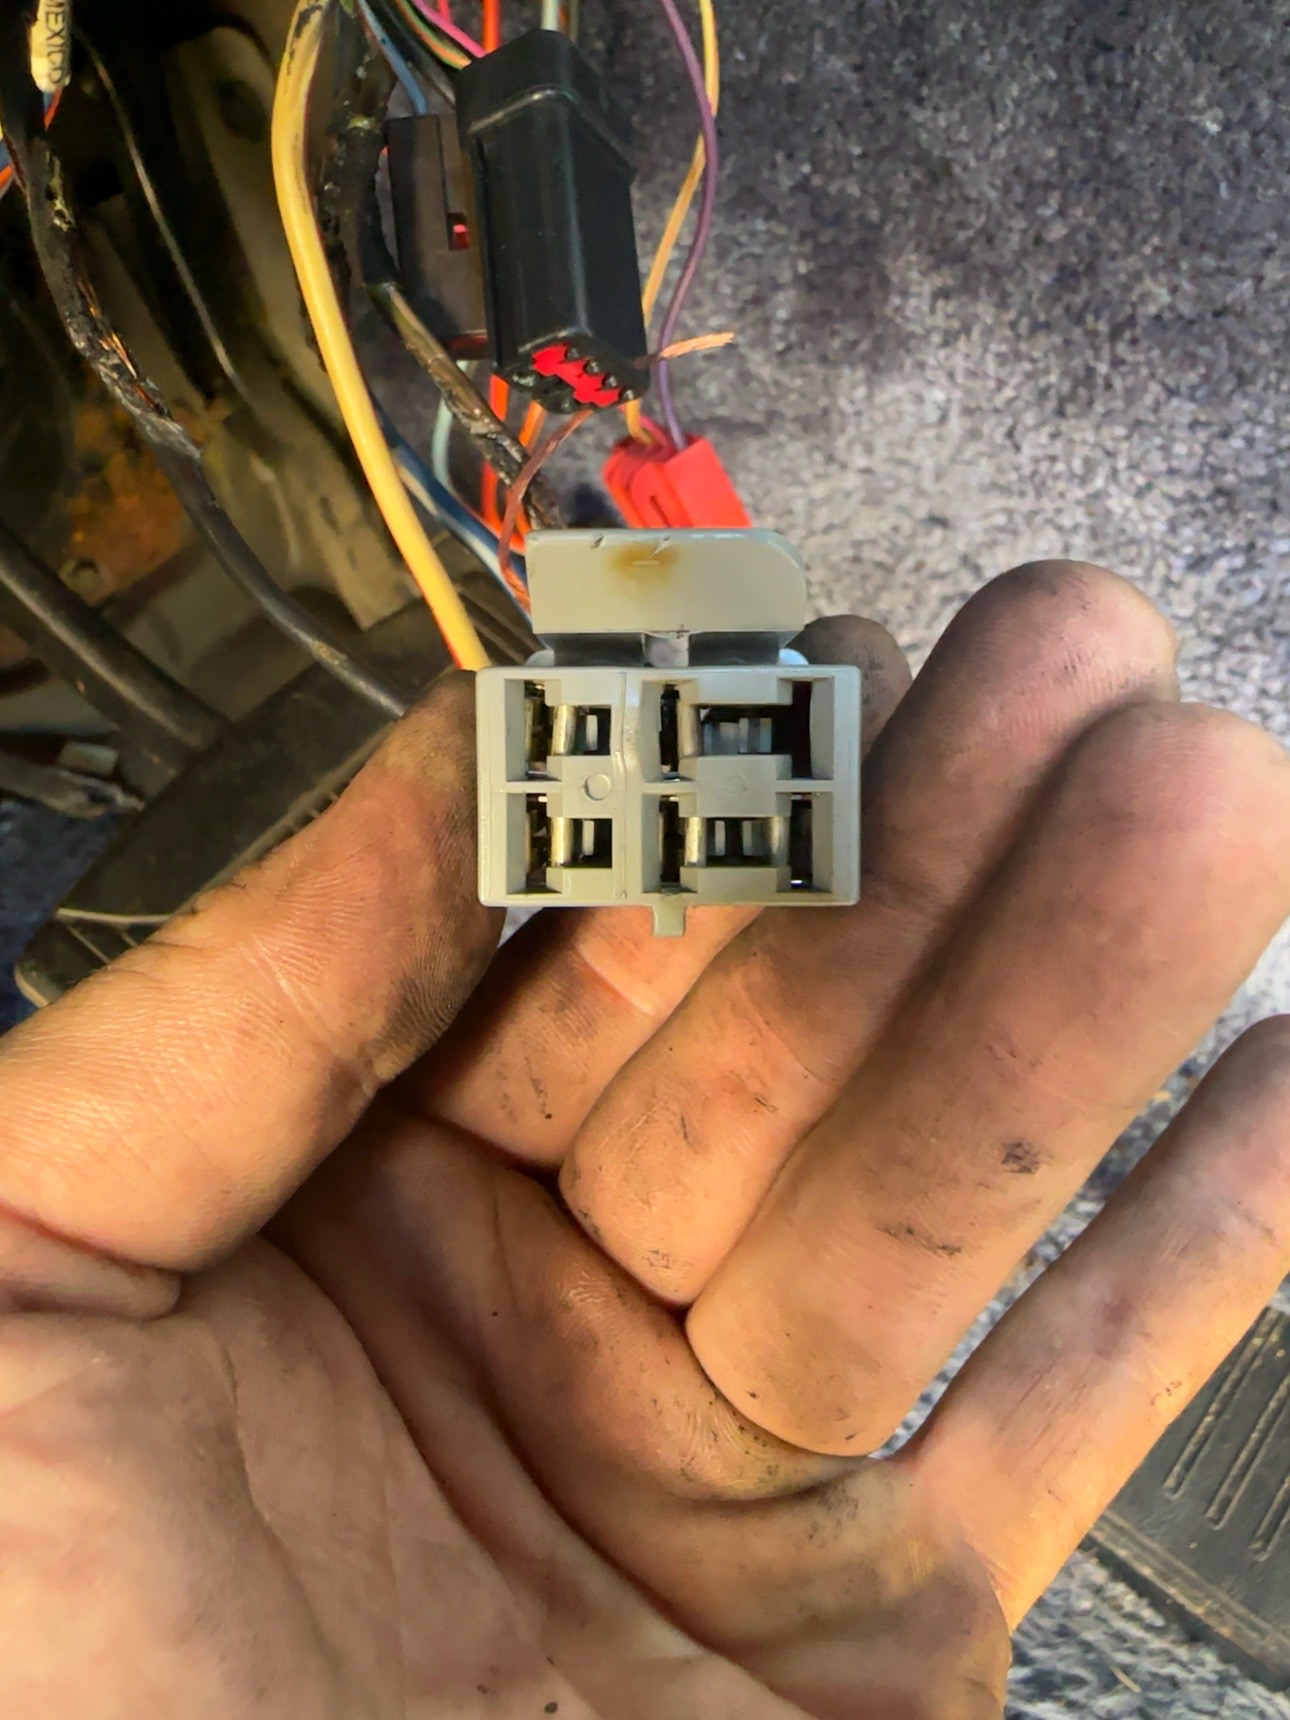
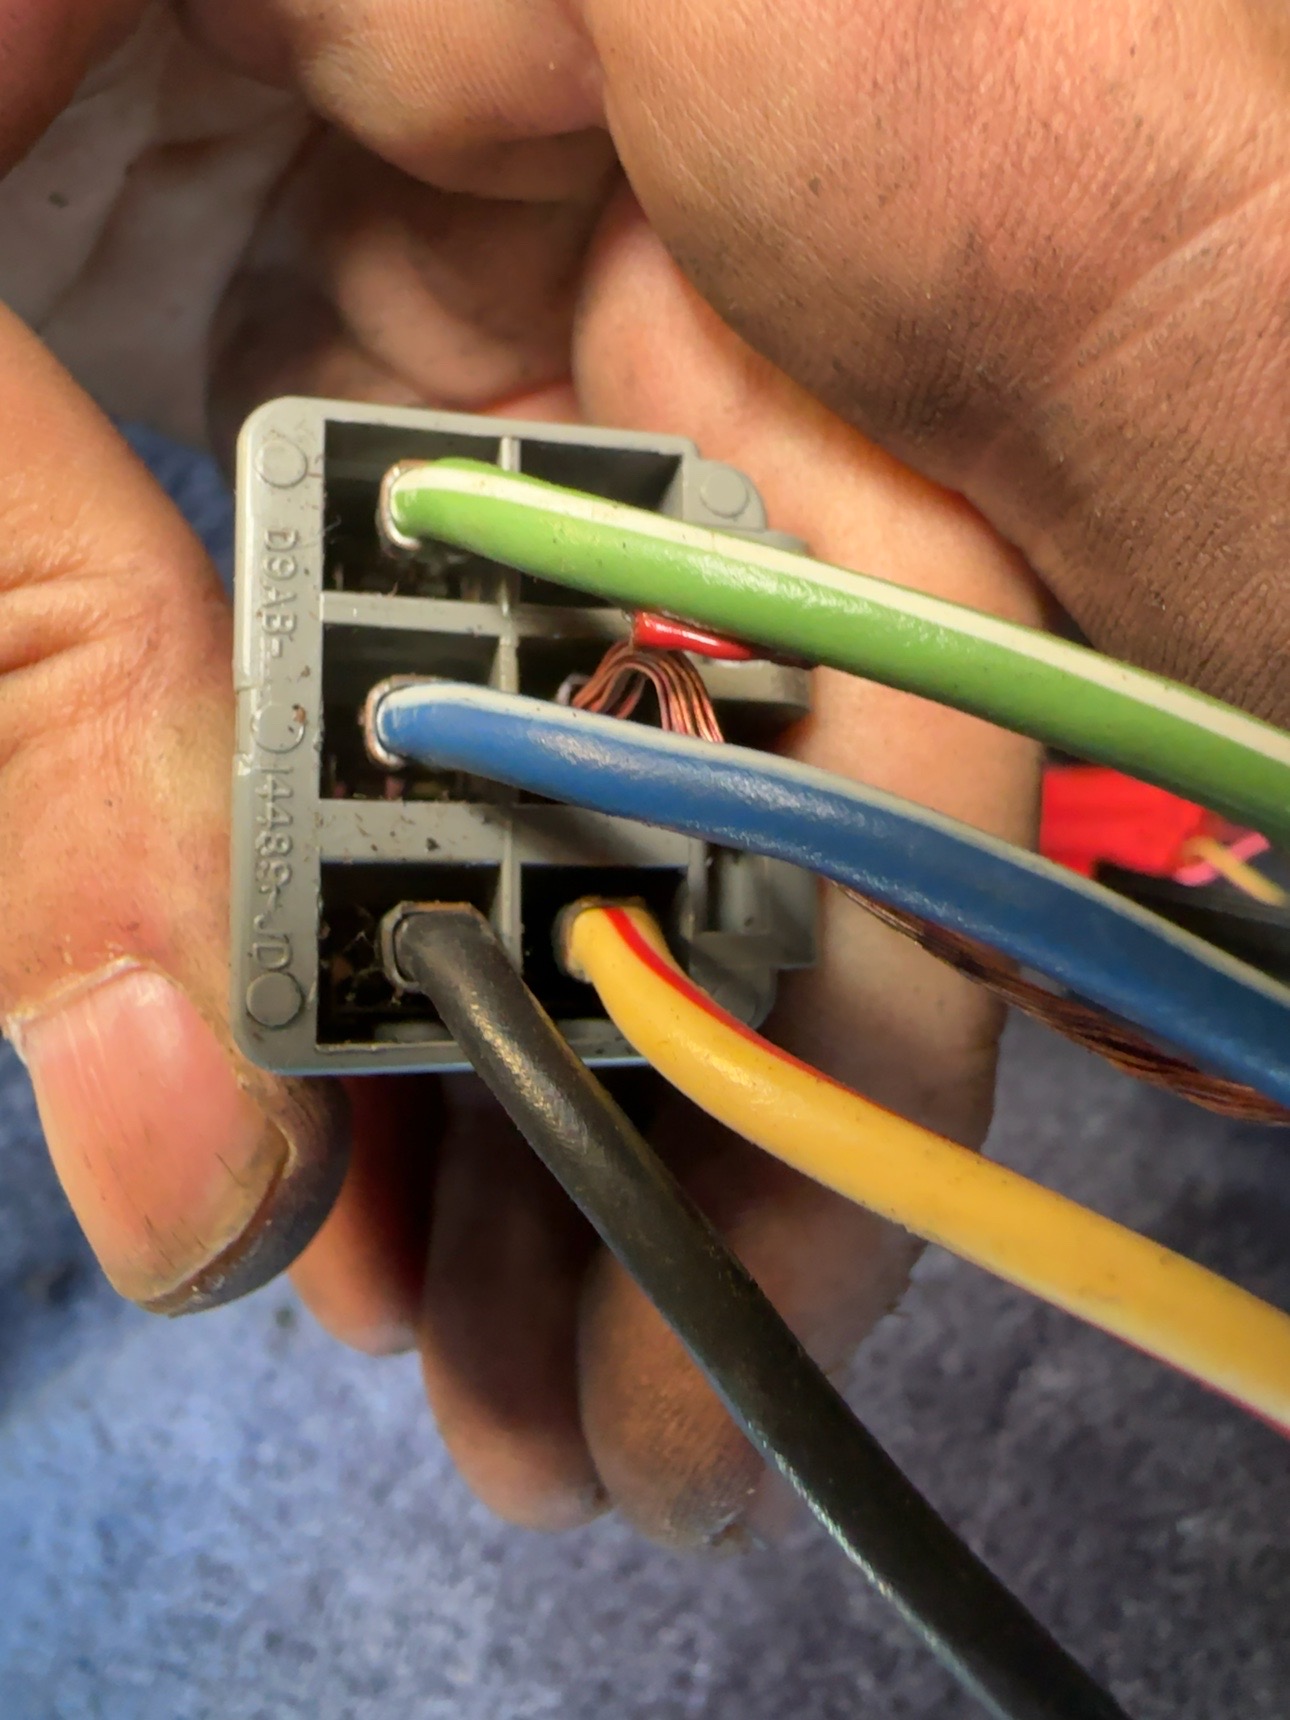
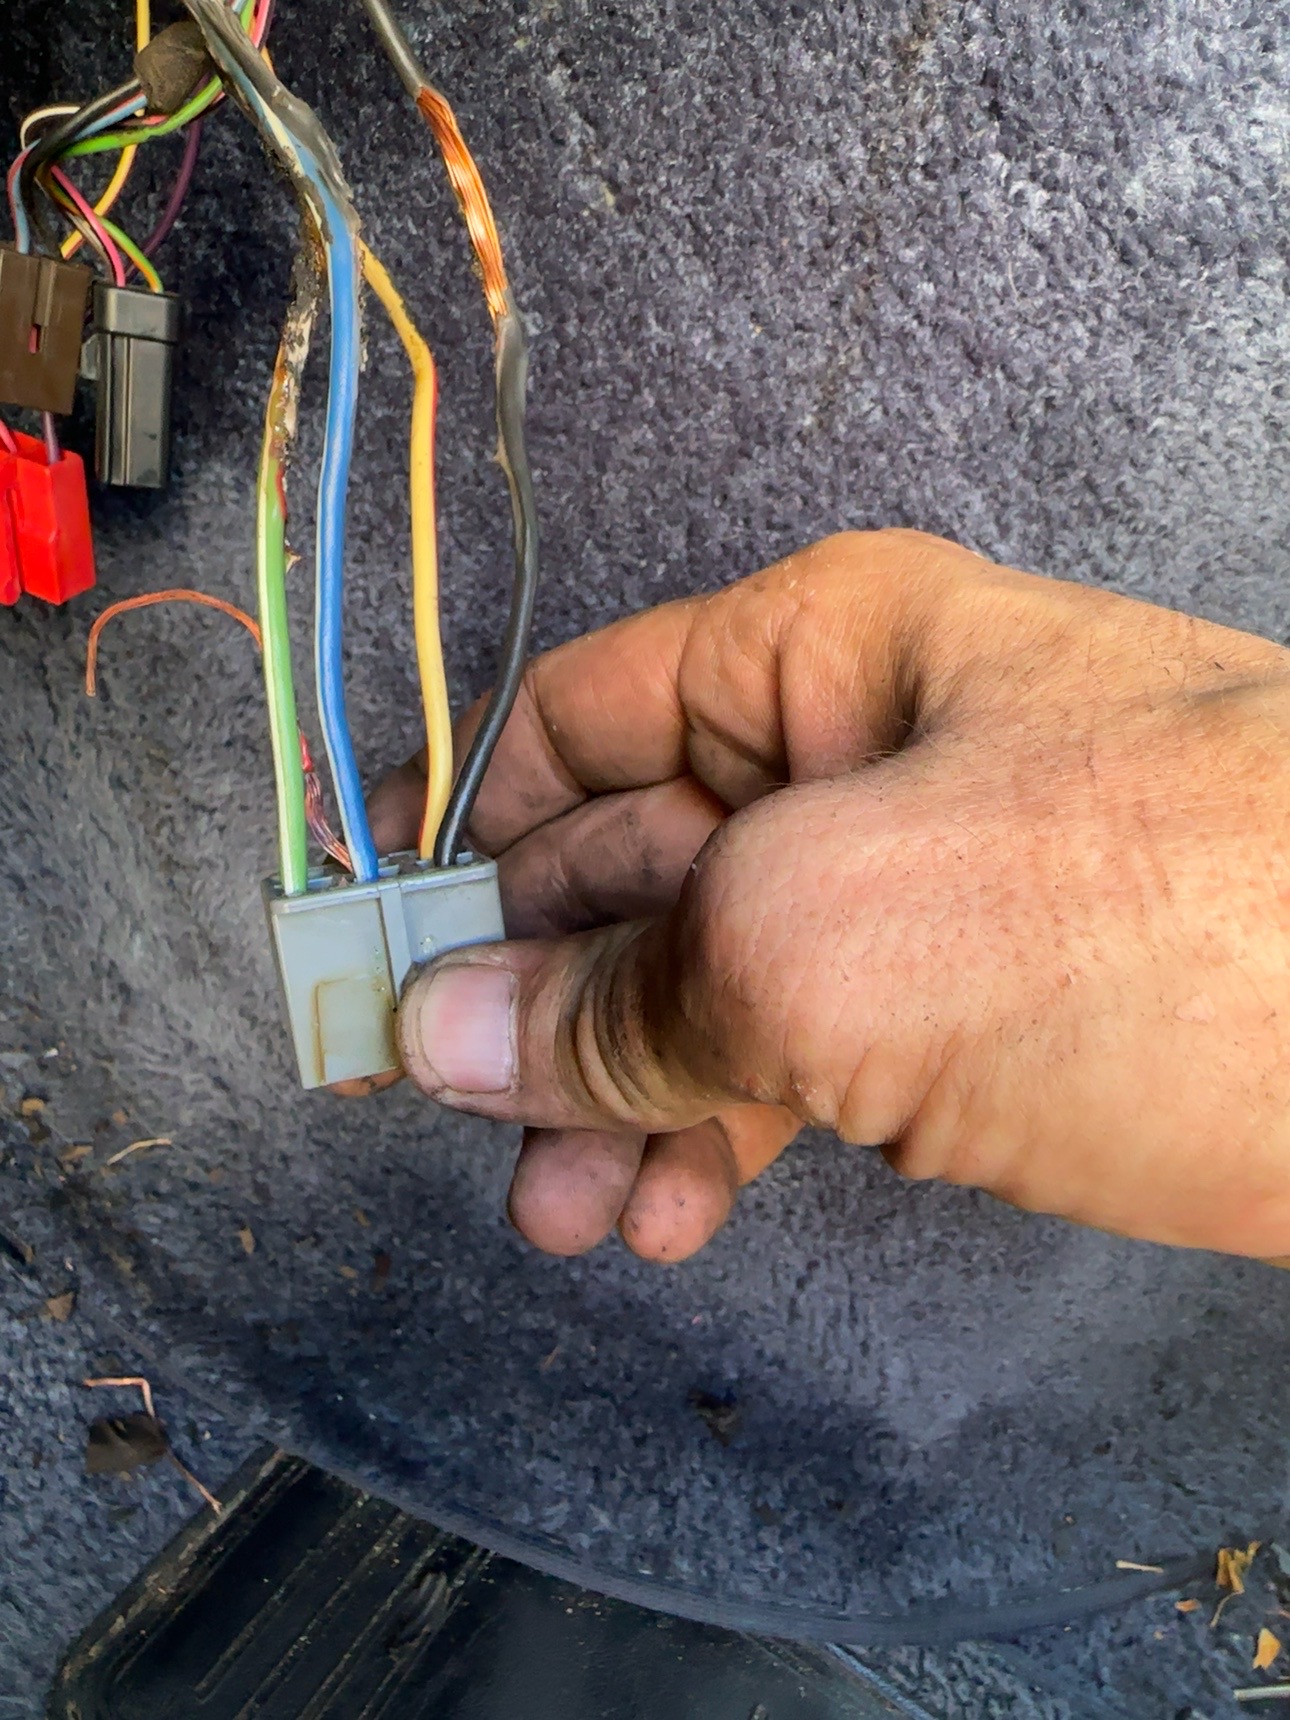
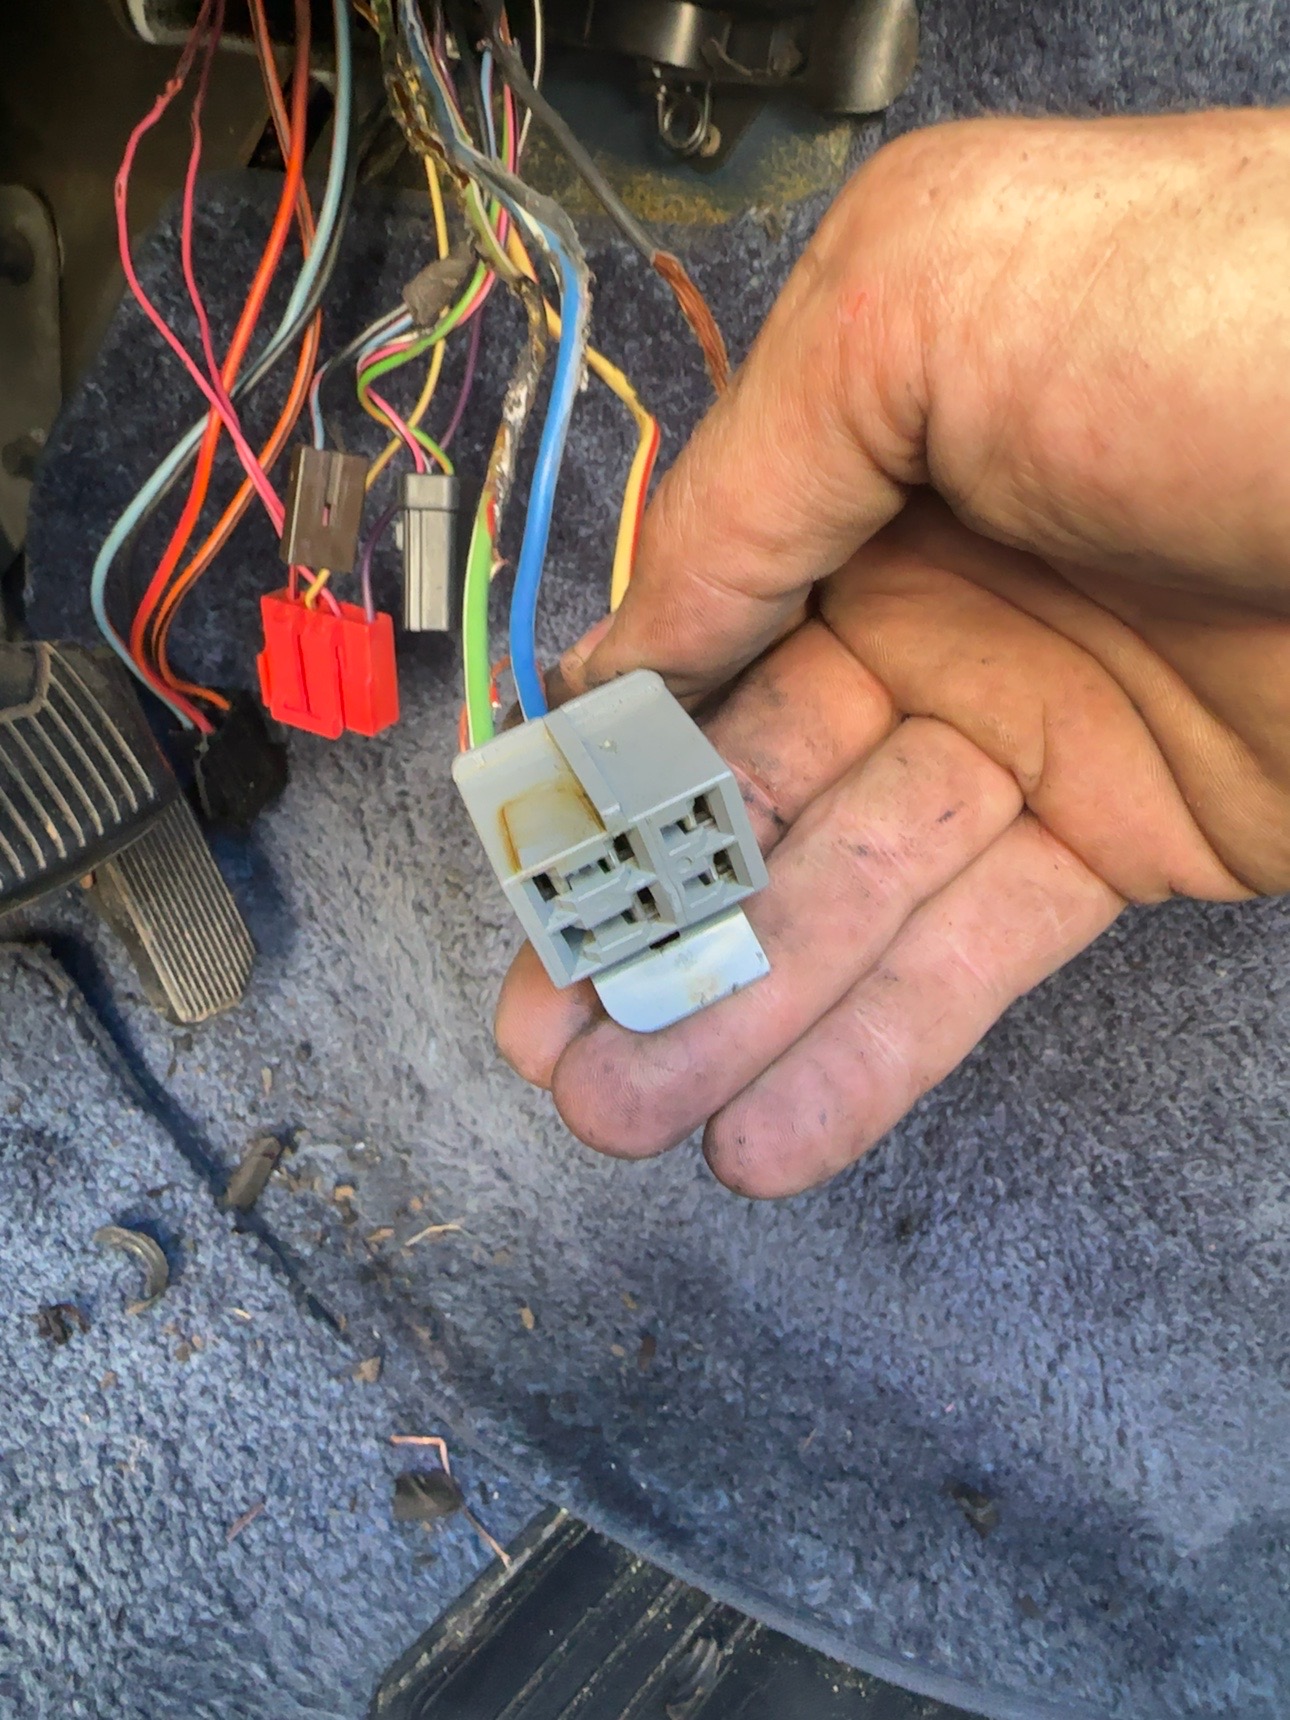
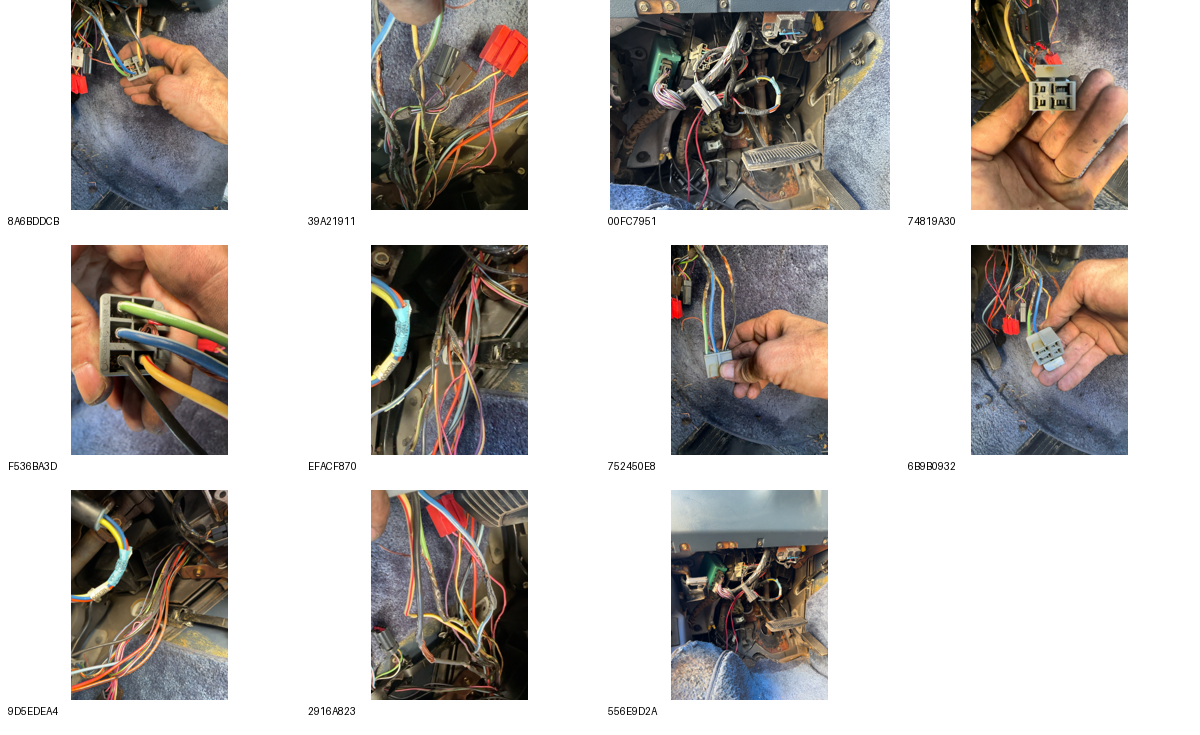
The dash is partially disassembled and the connectors and wire runs are photographed. Limited slack and access behind the support made it difficult to reach farther into the harness. We discussed individual-wire repair, but these notes do not establish that the damaged circuits have been repaired or tested.
The photographs document the condition and access points. They do not establish a connector pinout, the initiating fault, or which circuit caused the damage.
A second problem at the rear HVAC
The rear unit also had a melted added fuse holder or adapter, and I disconnected that unit during troubleshooting. I want that issue included in the inspection alongside the dashboard harness.
Whether the rear HVAC wiring is original Ford equipment, Elk conversion wiring, or a combination is still unresolved. I haven’t established whether the rear problem and dash damage share a cause.
Finding a shop willing to inspect a 1996 van
These are my reported call results, not a general directory or a guarantee of any shop’s current services.
- A&R Complete Auto Care: I was told they don’t work on vehicles this old.
- Tony Kennedy’s Crain’s Automotive: the call went to voicemail; I was waiting for a callback.
- St. B Automotive: they needed to see it before deciding and referred me elsewhere.
- L&W Truck Repair: I reported that the listed option was out of business.
- Audio Specialists: the audio-focused service wasn’t the harness-repair solution I needed.
- Mobile repair: I don’t have a suitable place for someone to do this work in the parking lot.
- Phillips Installation: I called them and plan to bring it for inspection after payday. Repair scope, acceptance and price await that inspection.
I also raised the vehicle’s age as a possible obstacle at Jenkins & Wynne; that was a concern, not a confirmed refusal from them.
What needs to come back from the inspection
- Establish the full extent of the harness damage, including the inaccessible section.
- Identify the affected circuits and the cause of the damage.
- Assess the rear HVAC feed and melted holder as a separate reported issue.
- Confirm repair versus replacement, the work the shop will accept, and a written quote.
- Document the completed work and test results before recording it as repaired.
The layout, insulation and cosmetic ideas are still possibilities. This electrical work is the immediate priority.
Wiring and teardown photos
Ten original files were recoverable from the conversation. The supplied overview below shows all eleven images, including the additional wide footwell view whose separate original file was not available. Open each image for the full-size version.
Keep following the build
Current build plan and spending → · All journal updates → · Layout studio →